#90DaysOfDevOps - Day 8: Basic Git & GitHub for DevOps Engineers.
👋 DevOps Enthusiast | Continuous Learner | Bridging Development & Operations | Automating for Efficiency 🌐🤝🚀 | Exploring the Ever-Evolving Tech Landscape | Passionate about Collaboration & Innovation | Let's Build, Deploy, and Soar Together! 💻🛠️🔭
Introduction
Today marks the 8th day of the 90 Days DevOps Challenge. Our focus today is on Git and GitHub. We'll learn about Git, GitHub, version control, and its types. We'll also understand why distributed version control is preferred over centralized systems. Practical tasks include installing Git, creating a GitHub account, making repositories, cloning, making changes, and pushing them. Let's dive in!
What is Version Control and its types?
A version control system maintains a record of changes to code and other content. It also allows us to revert changes to a previous point in time. It gives the ability to collaborate on a single project. You don’t have to worry about a collaborator (or your future self) overwriting something important. It also allows two people working on the same document to efficiently combine ideas and changes.

Types of version control:
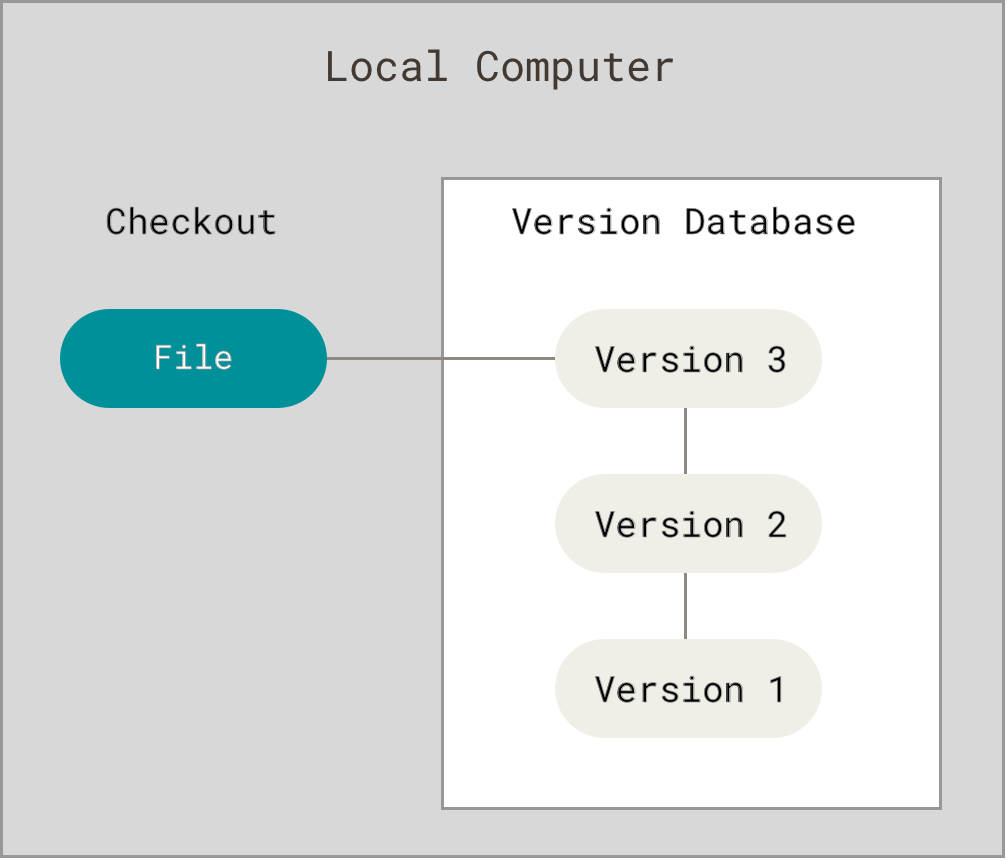
Local Version Control
Local version control is like a personal tool used by individual developers, not teams. Everything is stored on one computer. Changes are saved as updates, like patches. If something goes wrong, you need to piece together these updates to fix it.
This system is inflexible because it's tied to one computer. Working together is tough, and if things break, it's hard to recover.
Starting simple is okay, but as you grow or work with others, it's smarter to switch to a better system
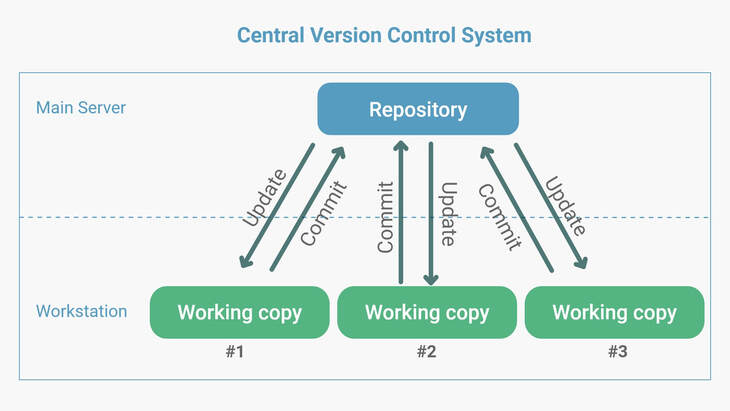
Centralized Version Control
Centralized version control uses a check-in/push workflow to connect to the main server. Changes are saved in the repository as a new version. They offer strong branching and merging abilities that don't require multiple machine cloning, adding a layer of security. However, they need a network connection and can slow down if there are interruptions. As all team members rely on one server-stored version, scaling up can be tricky. With more contributors, pushing changes becomes less stable, leading to potential issues like merge conflicts.
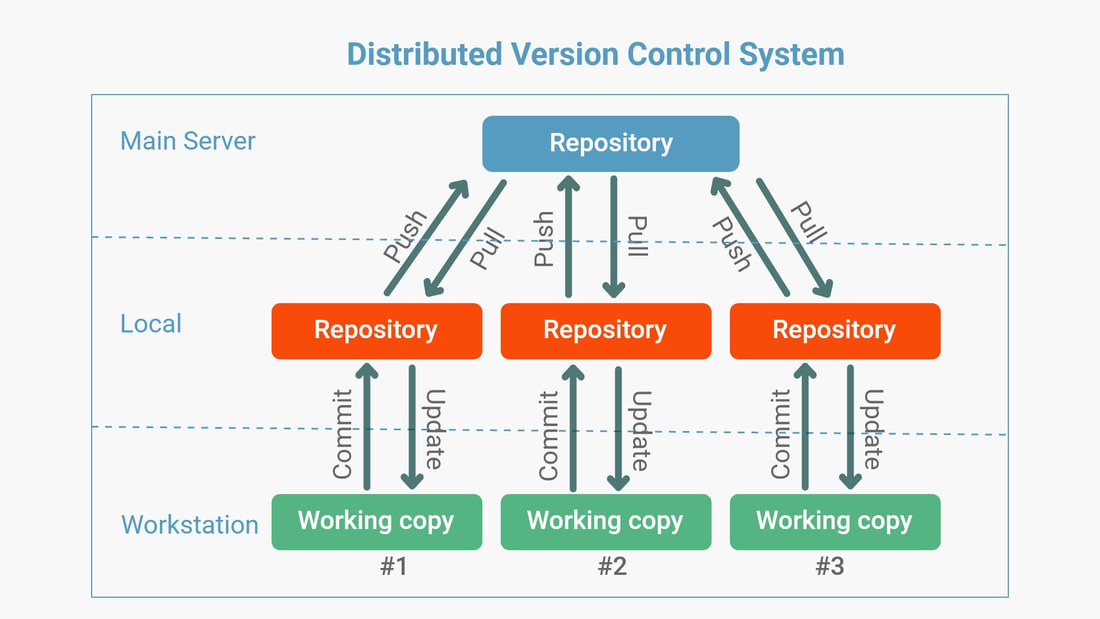
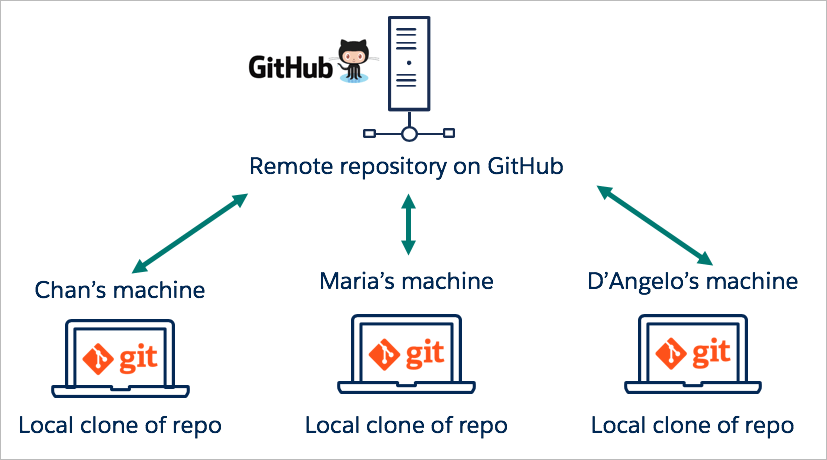
Distributed Version Control
Distributed version control systems empower users to check in, branch, and merge without relying on the main server connection. Contributors operate from cloned cloud repositories, allowing autonomous and rapid work without network or VPN concerns. Offline work is feasible, with an internet connection needed only for pushing or pulling updates.
However, downloading complete project histories can lead to delays, particularly in extensive projects with significant changes. Studios handling large binary files should mind storage usage, as such files occupy space swiftly.
For studios prioritizing flexibility and enhanced productivity, distributed version control offers a compelling solution.
Why do we use distributed version control over centralized version control?
It gives us the liberty to work fully offline.
It encourages frequent commits and experiments
It is easy to switch work like easily switching to different branches on priority even if we are in the middle of something.
It is a powerful tool for viewing and rewriting history
Increasingly popular as a more productive
What is Git?
Git is a distributed version control system that helps us track changes in our work, like keeping a detailed history of edits. It's widely used worldwide. One special thing about Git is its way of letting us work on different versions of our project at the same time, which is like trying out new ideas without affecting the main project. We can easily manage these different versions using commands and user-friendly interfaces."
What is GitHub?
GitHub serves as a platform for hosting Git repositories. It keeps everything organized and lets people work together on projects from anywhere. You can think of it as a place where your work is stored safely on the Internet. People can join in and help without messing up each other's work.
Tasks
Install git on the local machine
 #update the installed packages
 ubuntu@~$: sudo apt update -y

 #install git
 ubuntu@~$: sudo apt install git -y

 #check the version of git
 ubuntu@~$: git --version

 #configure git global settings
 #configure git username
 ubuntu@~$: git config --global user.name "<user_name>"

 #configure git user email id
 ubuntu@~$: git config --global user.email "<email_id>"
Create a free account on GitHub
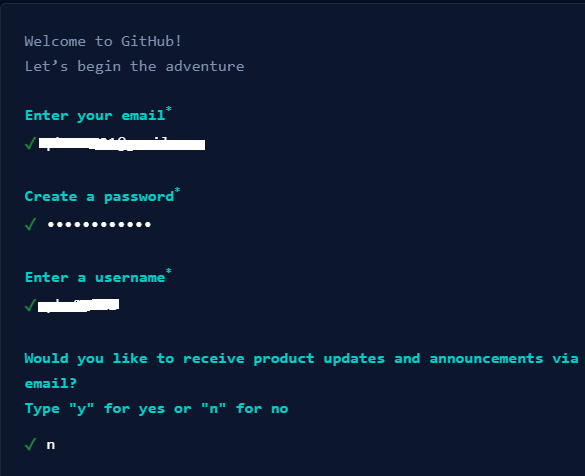
Go to GitHub page https://github.com/. Enter your email address and click on "SignUp"

Enter your details and click on "Create account"
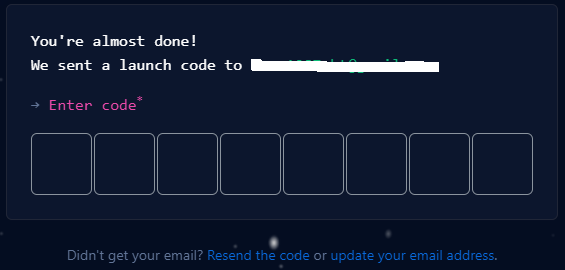
You need to verify your email id
Select "Just me" and continue

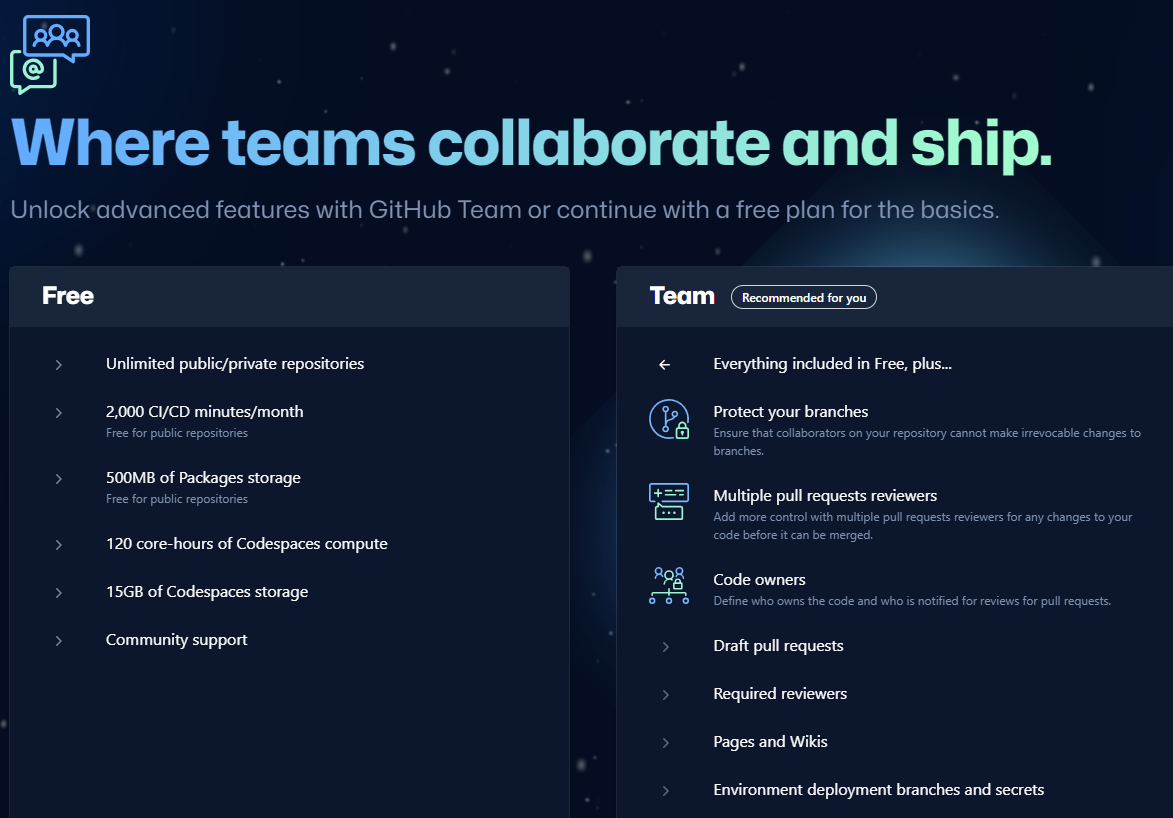
Select the features as per your needs.

Select the "free plan" as we are creating a free account.
Voila! You have created your free account on GitHub.
Create a new repository on GitHub
We will create our first repository on GitHub and clone it to our local machine.
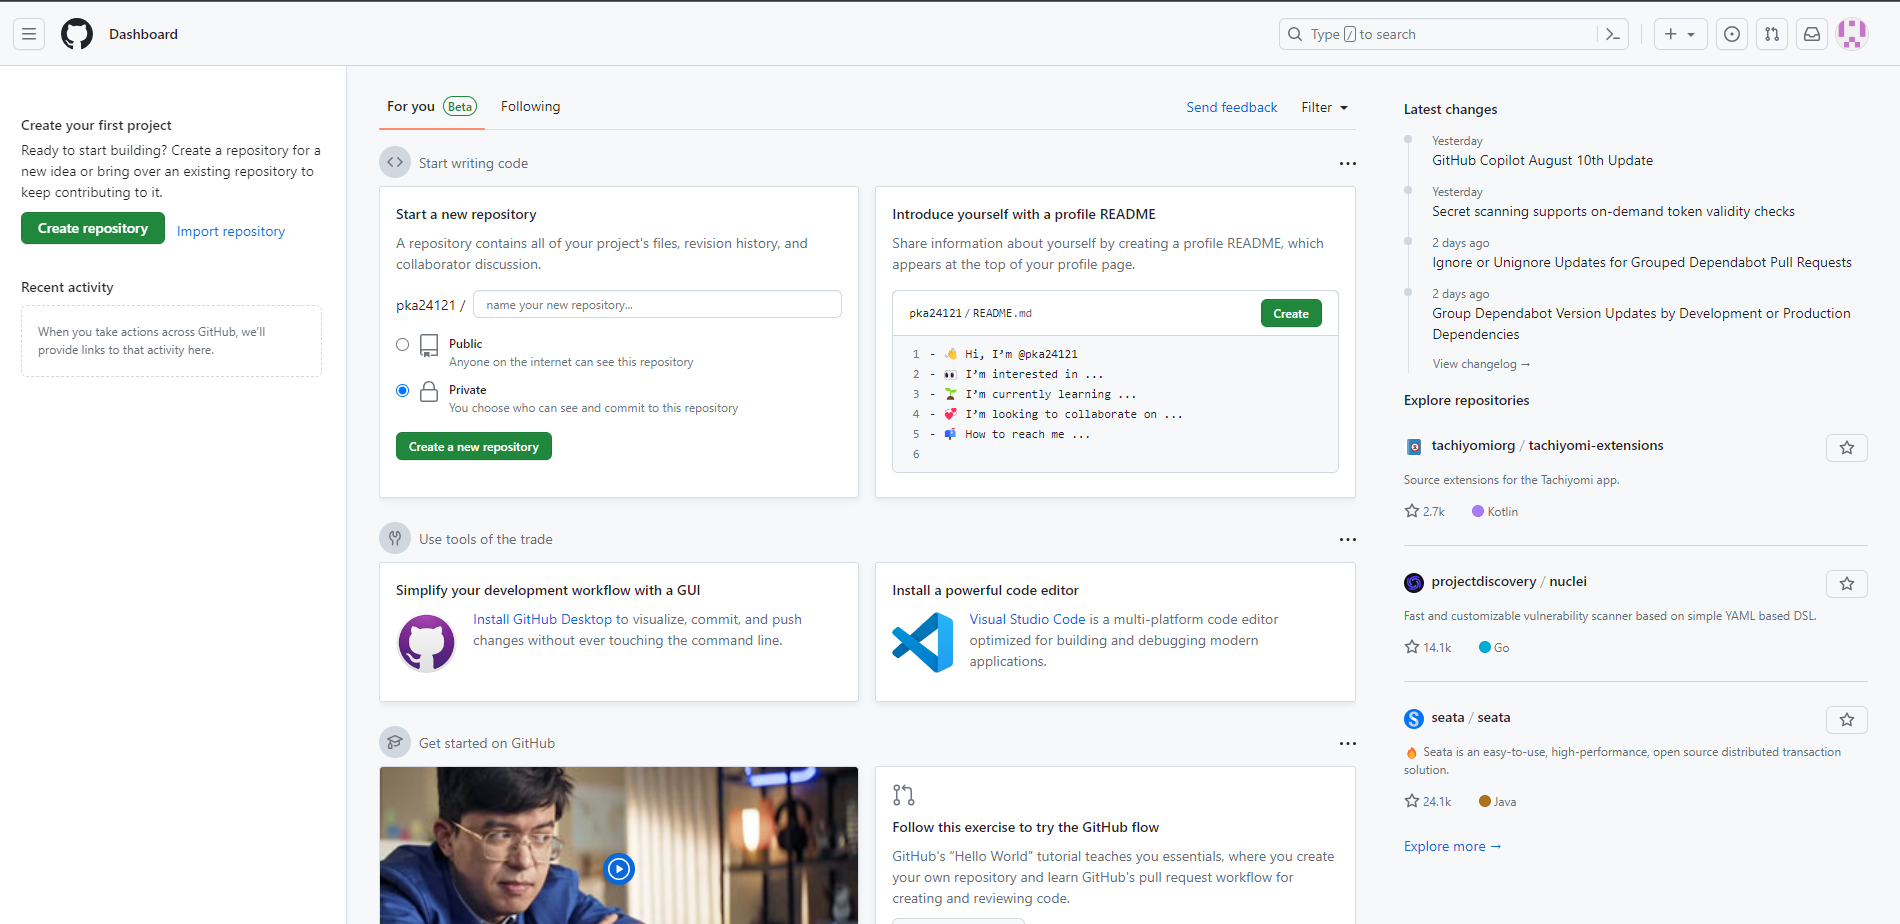
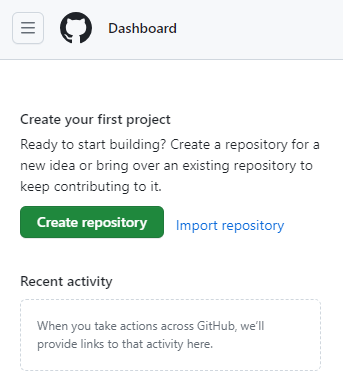
Go to your GitHub account dashboard and click on "Create repository"
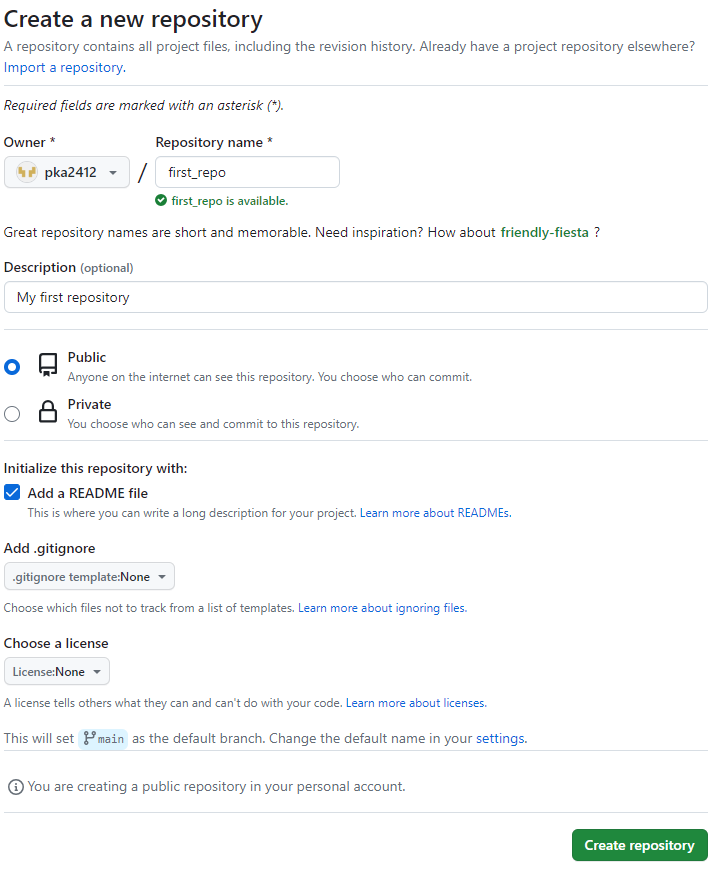
The create new repository page opens.
Enter your repository name.
Give a short description of your repository.
You can select the repository to be public or private.
You can add a README file to your repository that can be used to provide information about your repository.
Click on "Create repository".
You have created your first repository on GitHub.
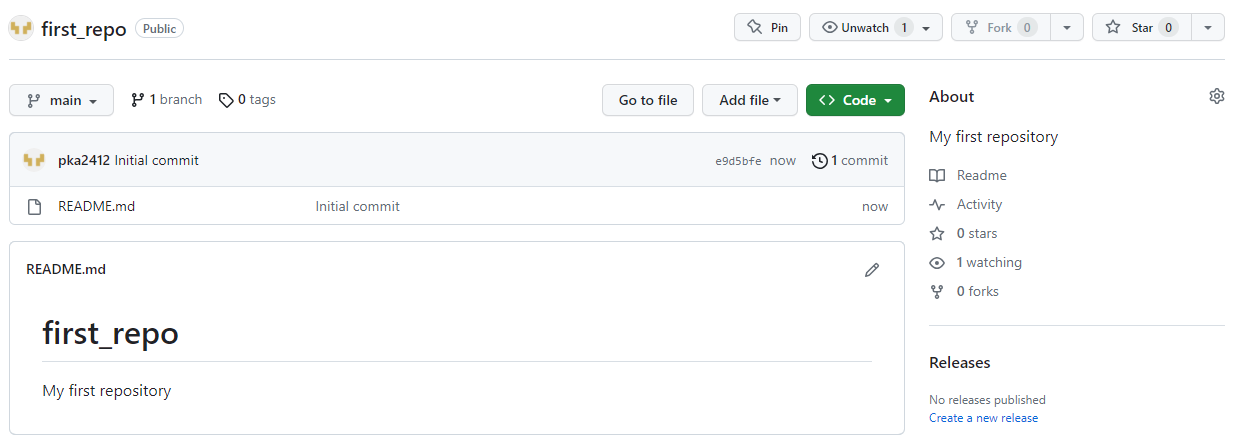
Now we will clone the first repository from GitHub to the local machine.
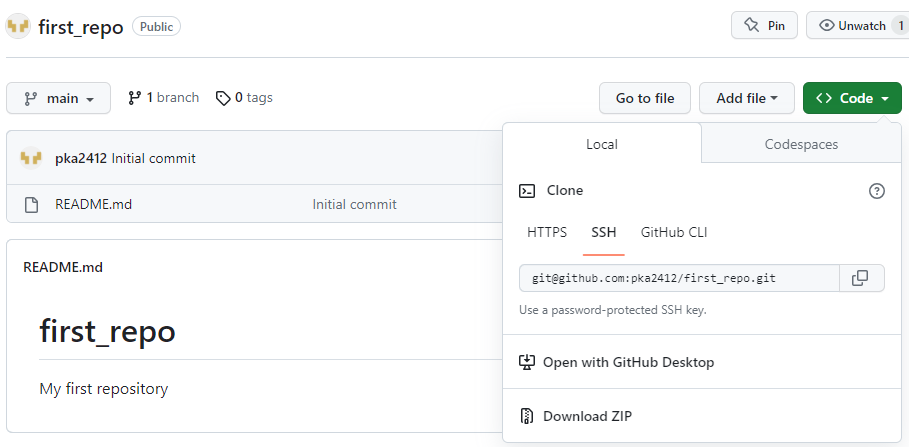
Click on "<> Code" and you will see three ways HTTPS, SSH, and GitHub CLI to clone the repository. We will use the SSH option which is the most preferred way of connecting to GitHub.
Connecting to GitHub using SSH
Open the terminal on your local machine. First, we need to check whether there are existing ssh key pair available on the machine
 ubuntu@~$: ls -al ~/.ssh
 total 12
 drwx------  2 ubuntu ubuntu 4096 Jul 26 12:58 .
 drwxr-x--- 10 ubuntu ubuntu 4096 Aug 12 22:46 ..
 -rw-------  1 ubuntu ubuntu  392 Jul 26 12:58 authorized_keys
We don't have any ssh key pair on the machine, so we now generate a new one using the
ssh-keygencommand.Enter the location where you want the keys to be generated. Press enter for the default location.
Enter the passphrase. You can use any passphrase.
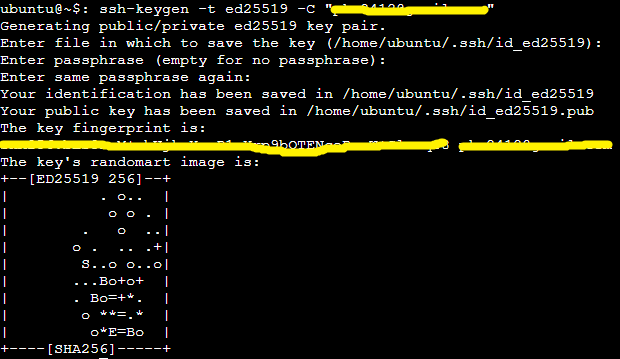
Verify the ssh key generation. Two keys
id_ed25519(private) andid_ed25519.pub(public) will be generated.ubuntu@~$: ls -al ~/.ssh total 20 drwx------ 2 ubuntu ubuntu 4096 Aug 13 05:20 . drwxr-x--- 10 ubuntu ubuntu 4096 Aug 12 22:46 .. -rw------- 1 ubuntu ubuntu 392 Jul 26 12:58 authorized_keys -rw------- 1 ubuntu ubuntu 464 Aug 13 05:20 id_ed25519 -rw-r--r-- 1 ubuntu ubuntu 99 Aug 13 05:20 id_ed25519.pubAdd SSH Key to SSH Agent.

Use the
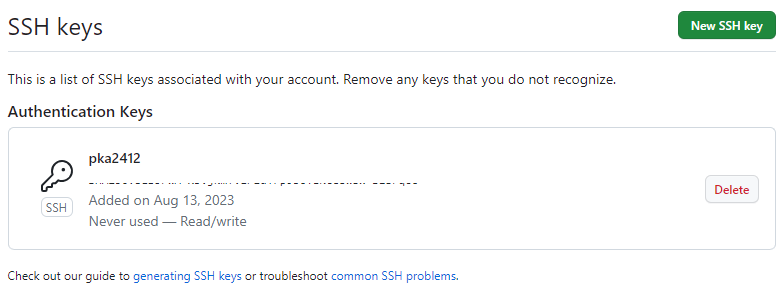
catcommand to display the contents ofid_ed25519.pubfile and copy it.Go to your GitHub account and add the SSH Key to your GitHub Account under the account settings. Copy paste the
id_ed25519.pubvalue in the key field and add the key.
We verify the connection to GitHub using the
sshcommand. Enter yes to confirm the github.com link and the connection is established between GitHub and local machine.
Cloning the GitHub repository to the local machine
Copy the URL and go to the terminal on the local machine.
 #clone the repository using the URL
 ubuntu@~$: git clone git@github.com:pka2412/first_repo.git
 Cloning into 'first_repo'...
 remote: Enumerating objects: 3, done.
 remote: Counting objects: 100% (3/3), done.
 remote: Total 3 (delta 0), reused 0 (delta 0), pack-reused 0
 Receiving objects: 100% (3/3), done.

 #a new folder with the repository name is created
 ubuntu@~$: ls
 first_repo  scripts

 #we move to the folder and check the contents
 #we see README.md which is the same we see on the GitHub repository
 ubuntu@~$: cd first_repo/
 ubuntu@~/first_repo$: ls -al
 total 16
 drwxrwxr-x 3 ubuntu ubuntu 4096 Aug 13 08:11 .
 drwxr-x--- 8 ubuntu ubuntu 4096 Aug 13 08:13 ..
 drwxrwxr-x 8 ubuntu ubuntu 4096 Aug 13 08:11 .git
 -rw-rw-r-- 1 ubuntu ubuntu   33 Aug 13 08:11 README.md
We have successfully cloned our first repository.
Make some changes to a file in the repository and commit them to the repository using Git
We will add a new file
first.txtwith some text and commit to the repository using git.ubuntu@~/first_repo$: echo "This is my first file added to the repository" > first.txt ubuntu@~/first_repo$: cat first.txt This is my first file added to the repository ubuntu@~/first_repo$: git status On branch main Your branch is up to date with 'origin/main'. Untracked files: (use "git add <file>..." to include in what will be committed) first.txt nothing added to commit but untracked files present (use "git add" to track)We create the
first.txtfile and addThis is my first file added to the repositorytext to the file.We use the
git statuscommand to get the status of our git repository. The first line is stating the branch that we are on, which is the master branch.The second line in the response mentions that our branch is up to date with the origin master.
The third section lists the files that have been changed and staged for commit.
The fourth section lists the files that have been changed and not staged for commit.
 ubuntu@~/first_repo$: git add -A
 ubuntu@~/first_repo$: git status
 On branch main
 Your branch is up to date with 'origin/main'.

 Changes to be committed:
   (use "git restore --staged <file>..." to unstage)
         new file:   first.txt
We use
git addcommand with-Aoption to move the repository changes to the staging area.-Ais used to include new, modified, and deleted files.ubuntu@~/first_repo$: git commit -m "Adding first file" [main 09b50db] Adding first file 1 file changed, 1 insertion(+) create mode 100644 first.txt ubuntu@~/first_repo$: git status On branch main Your branch is ahead of 'origin/main' by 1 commit. (use "git push" to publish your local commits) nothing to commit, working tree cleanWe commit the changes using
git commitand provide a useful message to give one-line information about the commit.We again use the
git statuscommand to check whether our repository is clean and doesn't have any changes.Push the changes back to the repository on GitHub
Once we have committed the changes to our local repository, we need to push the changes to the GitHub repository.
We use
git push origin <branch>to push the changes to GitHububuntu@~/first_repo$: git push origin main Enumerating objects: 4, done. Counting objects: 100% (4/4), done. Compressing objects: 100% (2/2), done. Writing objects: 100% (3/3), 315 bytes | 315.00 KiB/s, done. Total 3 (delta 0), reused 0 (delta 0), pack-reused 0 To github.com:pka2412/first_repo.git e9d5bfe..4f5f7ff main -> mainGo to the GitHub repository page and you will see that the
first.txthas been added to the repository.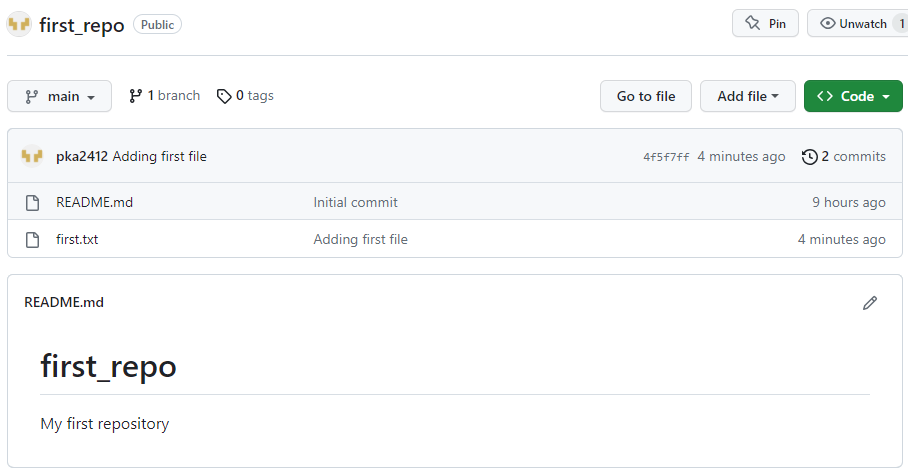
Conclusion
Today, we delved into the realm of version control, exploring its various types. Among them, the distributed version control system emerged as the favored choice. Our focus turned to the widely used tools, Git and GitHub. We initiated our journey by setting up a free GitHub account, followed by the creation of our inaugural GitHub repository. With finesse, we cloned the repository to our local machine, effectuated changes, and seamlessly pushed our modifications back to the GitHub platform.
"🌱 Keep learning, and spread the knowledge to inspire others. 🚀💡"